Showing posts with label Thanksgiving. Show all posts

Wednesday, November 21, 2012

{Thanksgiving Fun} Thanksgiving Treat Bags

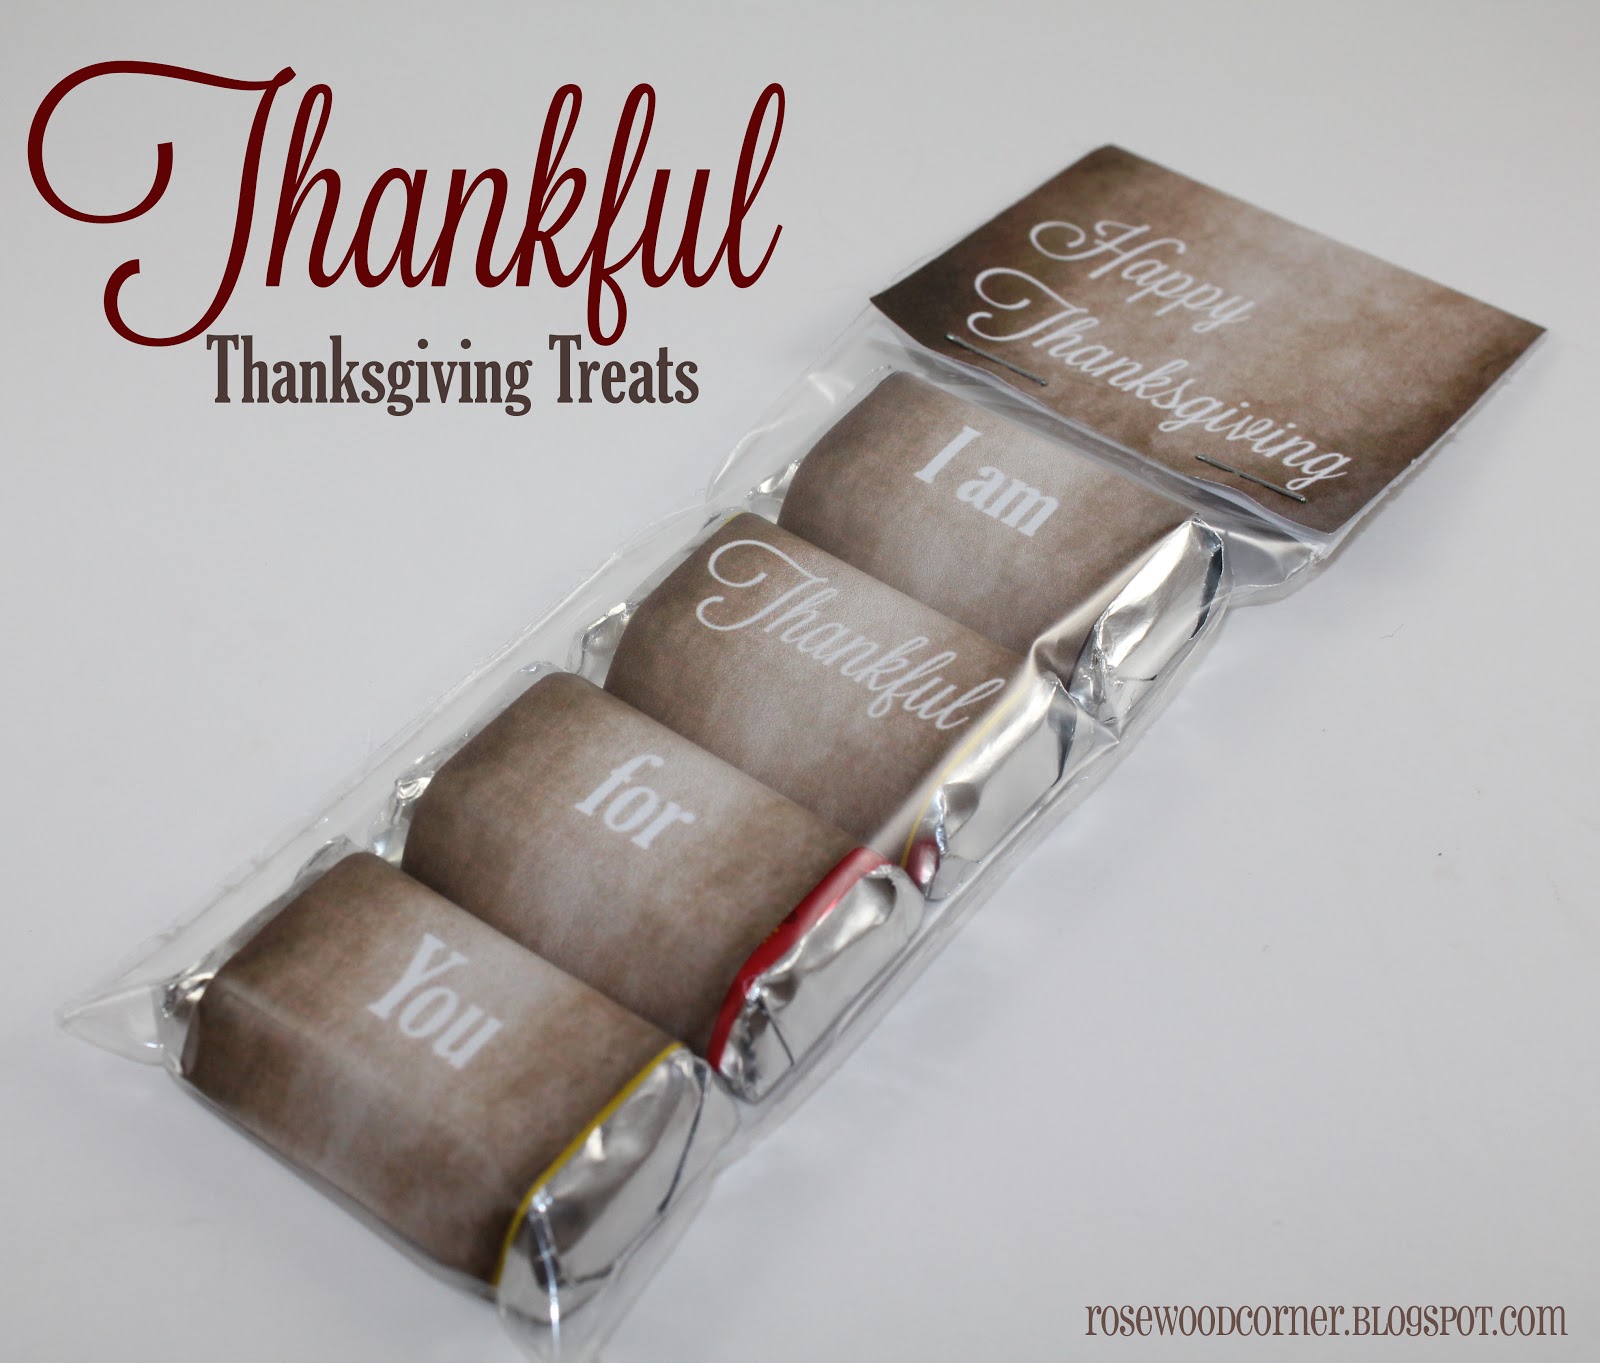
We really loved the St. Patrick's Day Rainbow Treat that Makoodle put together, and it inspired us to create a Thanksgiving version for a last minute friend and/or neighbor gift, or even to use as a place card for your Thanksgiving table. We made some printables for you, so these treats are really quick and easy. You only need a few things to put them together. 


Supplies
Printables
Pretzel Bags
Chocolates
Scissors
Glue stick
Double-sided tape or glue dots
Cardstock
Stapler

We used the Hershey's minis for our chocolate treats.

Print your wrappers and toppers and cut them out. We made the wrappers and toppers so you have some personalization options, but we'll explain that a little bit later. 

Here are the wrappers:

And here are the toppers:

Fold and wrap the wrappers around the chocolate and use a glue stick to glue the wrapper ends together.

We forgot to get a picture of the next step, but you will want to cut a piece of card stock a little bit shorter and a little bit skinnier than the row of your wrapped chocolates. Then, using double-sided tape or glue dots, secure your row of chocolates to the card stock. This will keep the chocolates in the order that you want them to be in once you place them inside the pretzel bag.

Here is an example of the pretzel bag that we have been talking about:

All you have to do is place your finished chocolate strip into a pretzel bag, cut off most of the excess plastic, and staple on the topper of your choice. 

You may choose to personalize the wrapper and leave the topper more generic like below. In this case, you end up with one more wrapped chocolate.

You may want to leave the personalized wrapper out and personalize the topper instead like this:

Or you can just keep it simple and skip the personalization.

However you choose to go about it, our printables have got you covered! We hope you guys enjoy!

You can find your wrappers here.
You can find the more generic toppers here, and the toppers you can personalize here.

*Our printables are for personal use only. Resale or redistribution of our printables is not permitted. Do not claim them as your own. If you post them elsewhere on the internet, link back to our blog and credit Rosewood Corner. Please do not remove any Rosewood Corner watermarks.

Tuesday, November 20, 2012

{Thanksgiving Fun} More Thanksgiving Games

We think the more fun games you have prepared for days like Thanksgiving, the better! Today we wanted to share some of the fun games we found around the internet last year that have passed the Thanksgiving day test with our own families!


We love this Turkey Hunt game from Prepared NOT Scared. The turkeys are so adorable, which makes the game even better!


This Turkey Feathers game from the idea room was a hit with our family!


And who wouldn't love this Autumn Tic Tac Toe Table from It's Overflowing? I love that the game pieces are mini pumpkins! So perfect for Thanksgiving!

Guess Who is such a fun game. And this Thanksgiving version from Mrs. Home Ec is such a fun twist on the original! 

There are a lot of great Thanksgiving games out there, but these definitely have been some of the favorites over at our houses. We hope you guys enjoy them as well!

Monday, November 19, 2012

{Thanksgiving Fun} Thankful Activities

We think it's important to remind our kids that Thanksgiving is more than turkey and mashed potatoes. We have started some traditions with our kids that they really seem to enjoy, and that really get everyone in the spirit of Thanksgiving.

We've been using these Thanks and Giving Trees from Chocolate on my Cranium for a couple of years now and absolutely love them. It's a great reminder that one of the ways we can express our gratitude for the blessings in our lives is to serve other people. The service can be simple, but it is amazing how much easier it is to count our blessings when we are looking for ways to serve. In our family, we add more leaves on each tree once a week and it is amazing how full our trees can get by Thanksgiving. These trees could be used as a Thanksgiving day or Thanksgiving week activity, or an activity for the entire month of November!


This was the first year we started using the Thanksgiving Countdown from Somewhat Simple and it has been so great! The countdown includes activities that you can do with your family every day to get them into a thankful frame of mind. Our kids have been so excited to see what our thankful activity is every day! The activities are simple enough that they are easy to fit into your day without a lot of advance planning, but they are really great about reminding us just how many blessings we have that we probably often take for granted!


This will be our first year using these Count Your Blessings printables from the Crafting Chicks and we're really excited about it. We are looking forward to having the kids fill them out every year and then seeing just how much their answers change as they get older!

Maybe the idea of using all of these activities is way too overwhelming for you, but it's amazing how much doing even one of these activities can turn your home into a more happy and grateful place! We think the more we can get our family into a thankful frame of mind, the better! These activities have really been a great addition to our family traditions and we hope you guys enjoy them too!

Saturday, November 17, 2012

{Quotes We Love} Sincerely Giving Thanks

We have a new Thanksgiving printable for you! We love this quote from Thomas S. Monson. It is such an important reminder, that is not only perfect for the Thanksgiving season, but could really be displayed in our homes all year round. 


This printable is formatted as an 8x10, and you can download your copy here.

Friday, November 16, 2012

{Thanksgiving Fun} Pilgrim Hat Games

As we mentioned before, Thanksgivings with our extended family go a lot smoother if we have some games planned for the kids. The pilgrim hats we shared the other day are perfect for a couple classic games with a Thanksgiving twist.


Musical Pilgrim Hats
Instead of circling around chairs, this game consists of circling around pilgrim hats placed on the floor with music playing in the background. There should be one less hat than people playing. When the music stops, everyone scrambles for a hat, and whoever finds themselves without one is out. One hat is removed from the center and another round begins, and the game continues until someone claims the last pilgrim hat in the final round. This game is a classic for a reason, so don't be surprised if it keeps your kids busy for awhile!

Pass the Pilgrim Hat
This is the Thanksgiving version of Hot Potato. This game only requires one pilgrim hat, with the players standing in a circle. Music is played in the background as each person puts the pilgrim hat on and claps their hands two times before passing the hat on to the person standing to their right. Whoever is wearing the hat when the music stops is out, and another round begins. The game continues until only one person is left standing.

Thanksgiving Playlist
Both of these games require some music to be played in order to work, and though you can really use whatever music you have on hand, we thought it would be fun to share the list of Thanksgiving songs we like to use. All of the songs are available on iTunes.

Turkey Time: Silly Bus
(I'm Gonna Eat) On Thanksgiving: Laurie Berkner
Thanksgiving Song: The Uncle Brothers
Gobble! Gobble! Gobble!: Hilary and James Simon Mayor
Thanksgiving: Kidzup Educational Music
Albuquerque The Turkey: Rita Mizrahi Shamie

Hopefully these games will help you guys have an even more fun and happy Thanksgiving!

Wednesday, November 14, 2012

{Thanksgiving Fun} Pilgrim Hats for Thanksgiving Games

I don't know about you guys, but Thanksgiving goes a lot smoother at our family get-togethers if we have some fun games planned for the kids. We made a larger version of our little pilgrim hat treat boxes to use in a few fun games to play while the turkey is in the oven. These pilgrim hats made from disposable plastic bowls are perfect for kids because they are sturdy enough to make it through a day of play.


Supplies
Disposable bowls (32 oz or even a little larger)
Black spray paint
Yellow sticky back foam sheet(s)
White grosgrain ribbon (somewhere around 7/8")
Scissors
Exacto Knife
Glue dots or double-sided tape

We didn't show a step-by-step tutorial this time, since it is basically the same process as the pilgrim hat treat boxes we made (you can find that tutorial here), with just a couple of differences. We used a larger size disposable bowl for the game hats, we think it's best to use the 32 oz disposable bowls (may say 4 cups or 1 quart). They may not be quite big enough for all kids to wear, but they work great for the purposes of our games. 

There are 19 grandkids in our family and we didn't want to hand-paint each one of the bigger bowls, so we went with the spray paint option. Since we weren't planning on putting any real food into the hats we went ahead and spray painted the inside of the hats with black spray paint. That made it a little easier to put the ribbon and buckle on the exterior of the hat without scratching or peeling any of the paint off, since the spray paint does not adhere to the plastic quite as well as the craft paint. We still had some scratching of the paint occur throughout the course of our games, but we figured we can do a quick touch-up if needed each year when we bring the hats back out.

The rest of the process is the same as for the little treat boxes. You just measure the ribbon to go around the bowl (we used a 7/8" grosgrain ribbon) and attach it with double-sided tape or adhesive dots. Next, cut out a buckle shape in your sticky back foam sheet (we used a regular yellow this time). The size of the buckle really depends on the size of your bowl, so you may want to cut out a buckle shape in paper first so you are certain what size you want to cut your foam. We typically like to cut the buckle into a square three times the size of the ribbon we are using, so that when we place the buckle over the ribbon, there is an equal amount of buckle on either side of the ribbon. Next, use an Exacto knife to cut out a square in the center of your foam buckle, in this case we cut out a 7/8" square. When you have the buckle cut out, peel off the back and stick the buckle on top of the ribbon. We like to place the sticky foam buckle so that the seam where the ribbon meets is hidden. 

And that's it! Pilgrim hats ready for Thanksgiving day games! Stayed tuned for game details!

Tuesday, November 13, 2012

{Thanksgiving Fun} Pilgrim Hat Treat Boxes

It's always fun to give friends and neighbors a little treat around holiday times, so we came up with this cute little pilgrim hat treat box to share this year. The idea was actually sparked by some leprechaun hat party favors we saw awhile back on a Canadian website (you can find that tutorial here). We thought the idea was cute enough for a pilgrim hat version, though we thought we would make our containers quite a bit smaller. Filling up those big bowls can take quite a few treats!


Supplies
Small disposable bowls (we used Glad 4oz containers with lids)
Black craft paint
Gold sticky backed foam sheet
1/4" white ribbon (ours had some texture to it)
Small foam brush
Scissors
Exacto knife
Glue dots or double-sided tape
Fall Hershey Kisses or another favorite treat

The 4oz containers can actually hold quite a few Kisses or other small treats.


We chose to use craft paint instead of spray paint for a couple of different reasons. We felt like we would have a little more control with craft paint, and since we knew we meant to use these little containers to hold treats, we wanted to make sure we didn't get paint anywhere we didn't want to (like anywhere food might end up touching). We also thought the more textured look we could get out of the craft paint might make the hats look a little more fun. 

The hardest part of painting the hats was getting the paint into the little crevices in the bowl and lid. We wanted to keep the paint out of the inside of the container and the off the inside of the lid, so we used the tip of our small foam brush to squeeze the paint down into the little crevice around the bowl lip. 


After the inside of the lip was filled, we dabbed the rest of the container and lid with paint, taking care to keep the texture even. I think our first container took three coats but we were down to two coats by the second or third container as we got a little better at it. 


While we were waiting for our little hats to dry, we cut out our ribbon. The length of your ribbon is really going to depend on the size of the container you get, so just make sure that your ribbon wraps all the way around your container before you cut it. We attached the ribbon to the painted container with a glue dot, but double-sided tape would work as well. The foam buckle has a sticky back so it will actually help hold the ribbon in place, but we found it easier to work with such a small ribbon if it was secured in place a little better to begin with. 

Foam sticky back sheets come in a lot of different colors, but we thought the gold was especially fun for the buckle.


Since our ribbon was 1/4" wide, we started by cutting out a 3/4" square, so we could have an equal width of buckle on either side of the ribbon. We used an exacto knife to cut out a 1/4" square in the center of the 3/4" gold foam square. Then we removed the backing and placed the buckle on the container so that it would cover the seam where the ribbon met. 

That's it! Just add some tasty little treats and you are ready to go! 


If you really wanted to, you could make a bigger version and fill it with a stack of cookies or something. We'll leave those decisions to you! 

Tomorrow we are sharing a large version to use in some Thanksgiving day games so be sure to check them out!

Friday, November 9, 2012

{Quotes We Love} Gratitude

Now that we are past Halloween and past the election, I'm realizing that Thanksgiving is just a couple of weeks away! With such a short time left before that important holiday, I think it's definitely time for our printables to start reflecting this season of thanks and gratitude.

I love this quote from Melody Beatti, I think it's such a simple but important truth. Gratitude makes everything in life better. When we are grateful, we spend less time wishing about what could be, and more time appreciating what is.

I had such a hard time deciding which way I wanted to go with this printable that I decided to give you two options and let you pick! Both options are available in 8x10 and 16x20.


The cream 8x10 can be downloaded here, and the cream 16x20 here.
The chalkboard 8x10 can be downloaded here, and the chalkboard 16x20 here.

*You can find the chalkboard background here.

*Our printables are for personal use only. Resale or redistribution of our printables is not permitted. Do not claim them as your own. If you post them elsewhere on the internet, link back to our blog and credit Rosewood Corner. Please do not remove any Rosewood Corner watermarks.